A Step-By-Step DIY Tile Flooring Installation Guide
 A well-installed tile flooring with always add some style and appeal to any room. It’s a useful flooring that’s long-lasting, easy-to-clean and doesn’t require much to maintain. When it comes to installing your tile floor, most of the time you’d call your local floor tiles Adelaide installation service to do the job for you. However, it’s super easy that you can do it on your own. Here’s a simple step-by-step process on how you can install a tile floor:
Pre-installation
The first thing you need to do is to prepare your subfloor and make it ready for laying your tile. Keep in mind that floor tiles are laid starting from the first tile on the middle centre of the floor and working onwards from that.
Step 1: Create a mixture of unmodified mortar in a small bucket. Stop mixing when it reaches manufacture-recommended consistency.
Step 2: Using a trowel, start spreading the unmodified mortar, starting at your established reference line. Make sure your reference lines does not become obscured, Spread evenly throughout your floor.
Step 3: Remove some excess mortar and return it to the small bucket.
Tile Installation Proper
Step 1: Lay the first tile at the very crossing of your reference line. For the best results, lightly push and twist the tiles to firmly set them into the mortar.
Step 2: Position the spacers at the very edges of the first tile.
Step 3: Continue laying other tiles using the instructions on levels 1 & 2; add spacers.
Step 4: Once a work section is complete, use a rubber mallet along with a carpenter’s level to make the tile flooring levelled.
Step 5: Using a damp sponge, remove any excess mortar.
Step 6: Continue with the previous steps for the other parts of the floor. Make adjustments when necessary, making sure that the tiles are aligned straight.
Step 7: Apply another thin layer of unrefined mortar and fill in small uneven areas with cut tile. Also, add spaces if needed.
Step 8: Set the mortar to dry for 24 to 48 hours
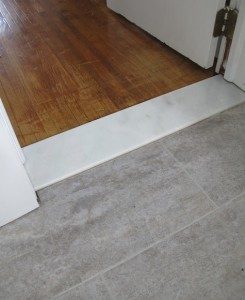
NOTE: You should always make adjustments when needed. If you are near doorways and other types of flooring transitions, you will need to trim your tiles to make further installations fit in nicely.
Installation Success!
Congratulations! You’ve successfully executed a DIY installation of your floor tiles Adelaide. It wasn’t that hard, was it? Survey your entire work and see if there are any loopholes or any uneven sections that you need to fix quickly. Overall, you did a great job. Way to go!